Table of Contents
Overview
This tutorial/lesson plan describes how to create two KookaBlockly programmes to measure Relative Humidity (RH) and Temperature using the DHT11 peripheral and the Kookaberry microcontroller STEM platform.
One programme records constantly; the other at the press of a Kookaberry button.
PDF documents for both programmes, as well as the resources and learning outcomes component, can be downloaded from the sidebar to the right
Age
This plan is targeted at students in years 5&6 (Stage 3) but can be introduced in Stage 3 and as a bridging course between visual and text-based programming languages in Stage 4. This is because KookaBlockly allows students to see the text-based python code behind the blocks.
Time
This plan (without extensions) should take 1 hour of classroom time per programme.
Learning Outcomes
- Observe how data can be represented by numbers and symbols [screen display)]
- Write and edit a programme in a visual programming language [KookaBlockly]
- Recognise that steps in algorithms need to be accurate and precise [position of text on screen]
- Learn about, use and control an output device [DHT11 peripheral]
- Learn how to trouble shoot through trial and error whilst programming in real time [vary position of text on screen]
- Learn how to use variables in programs [RH and T are two independent variables]
- Learn how to input and change user data in a programme [selection of correct variable description]
- Save and rename files across multiple locations [Add a .kby suffix]
A map of learning outcomes can be downloaded from the sidebar to the right [Note: Awaiting release of new National Technologies Curriculum]
Learning Extensions
- Add an output on P2 if T falls below a specified limit.
Resources
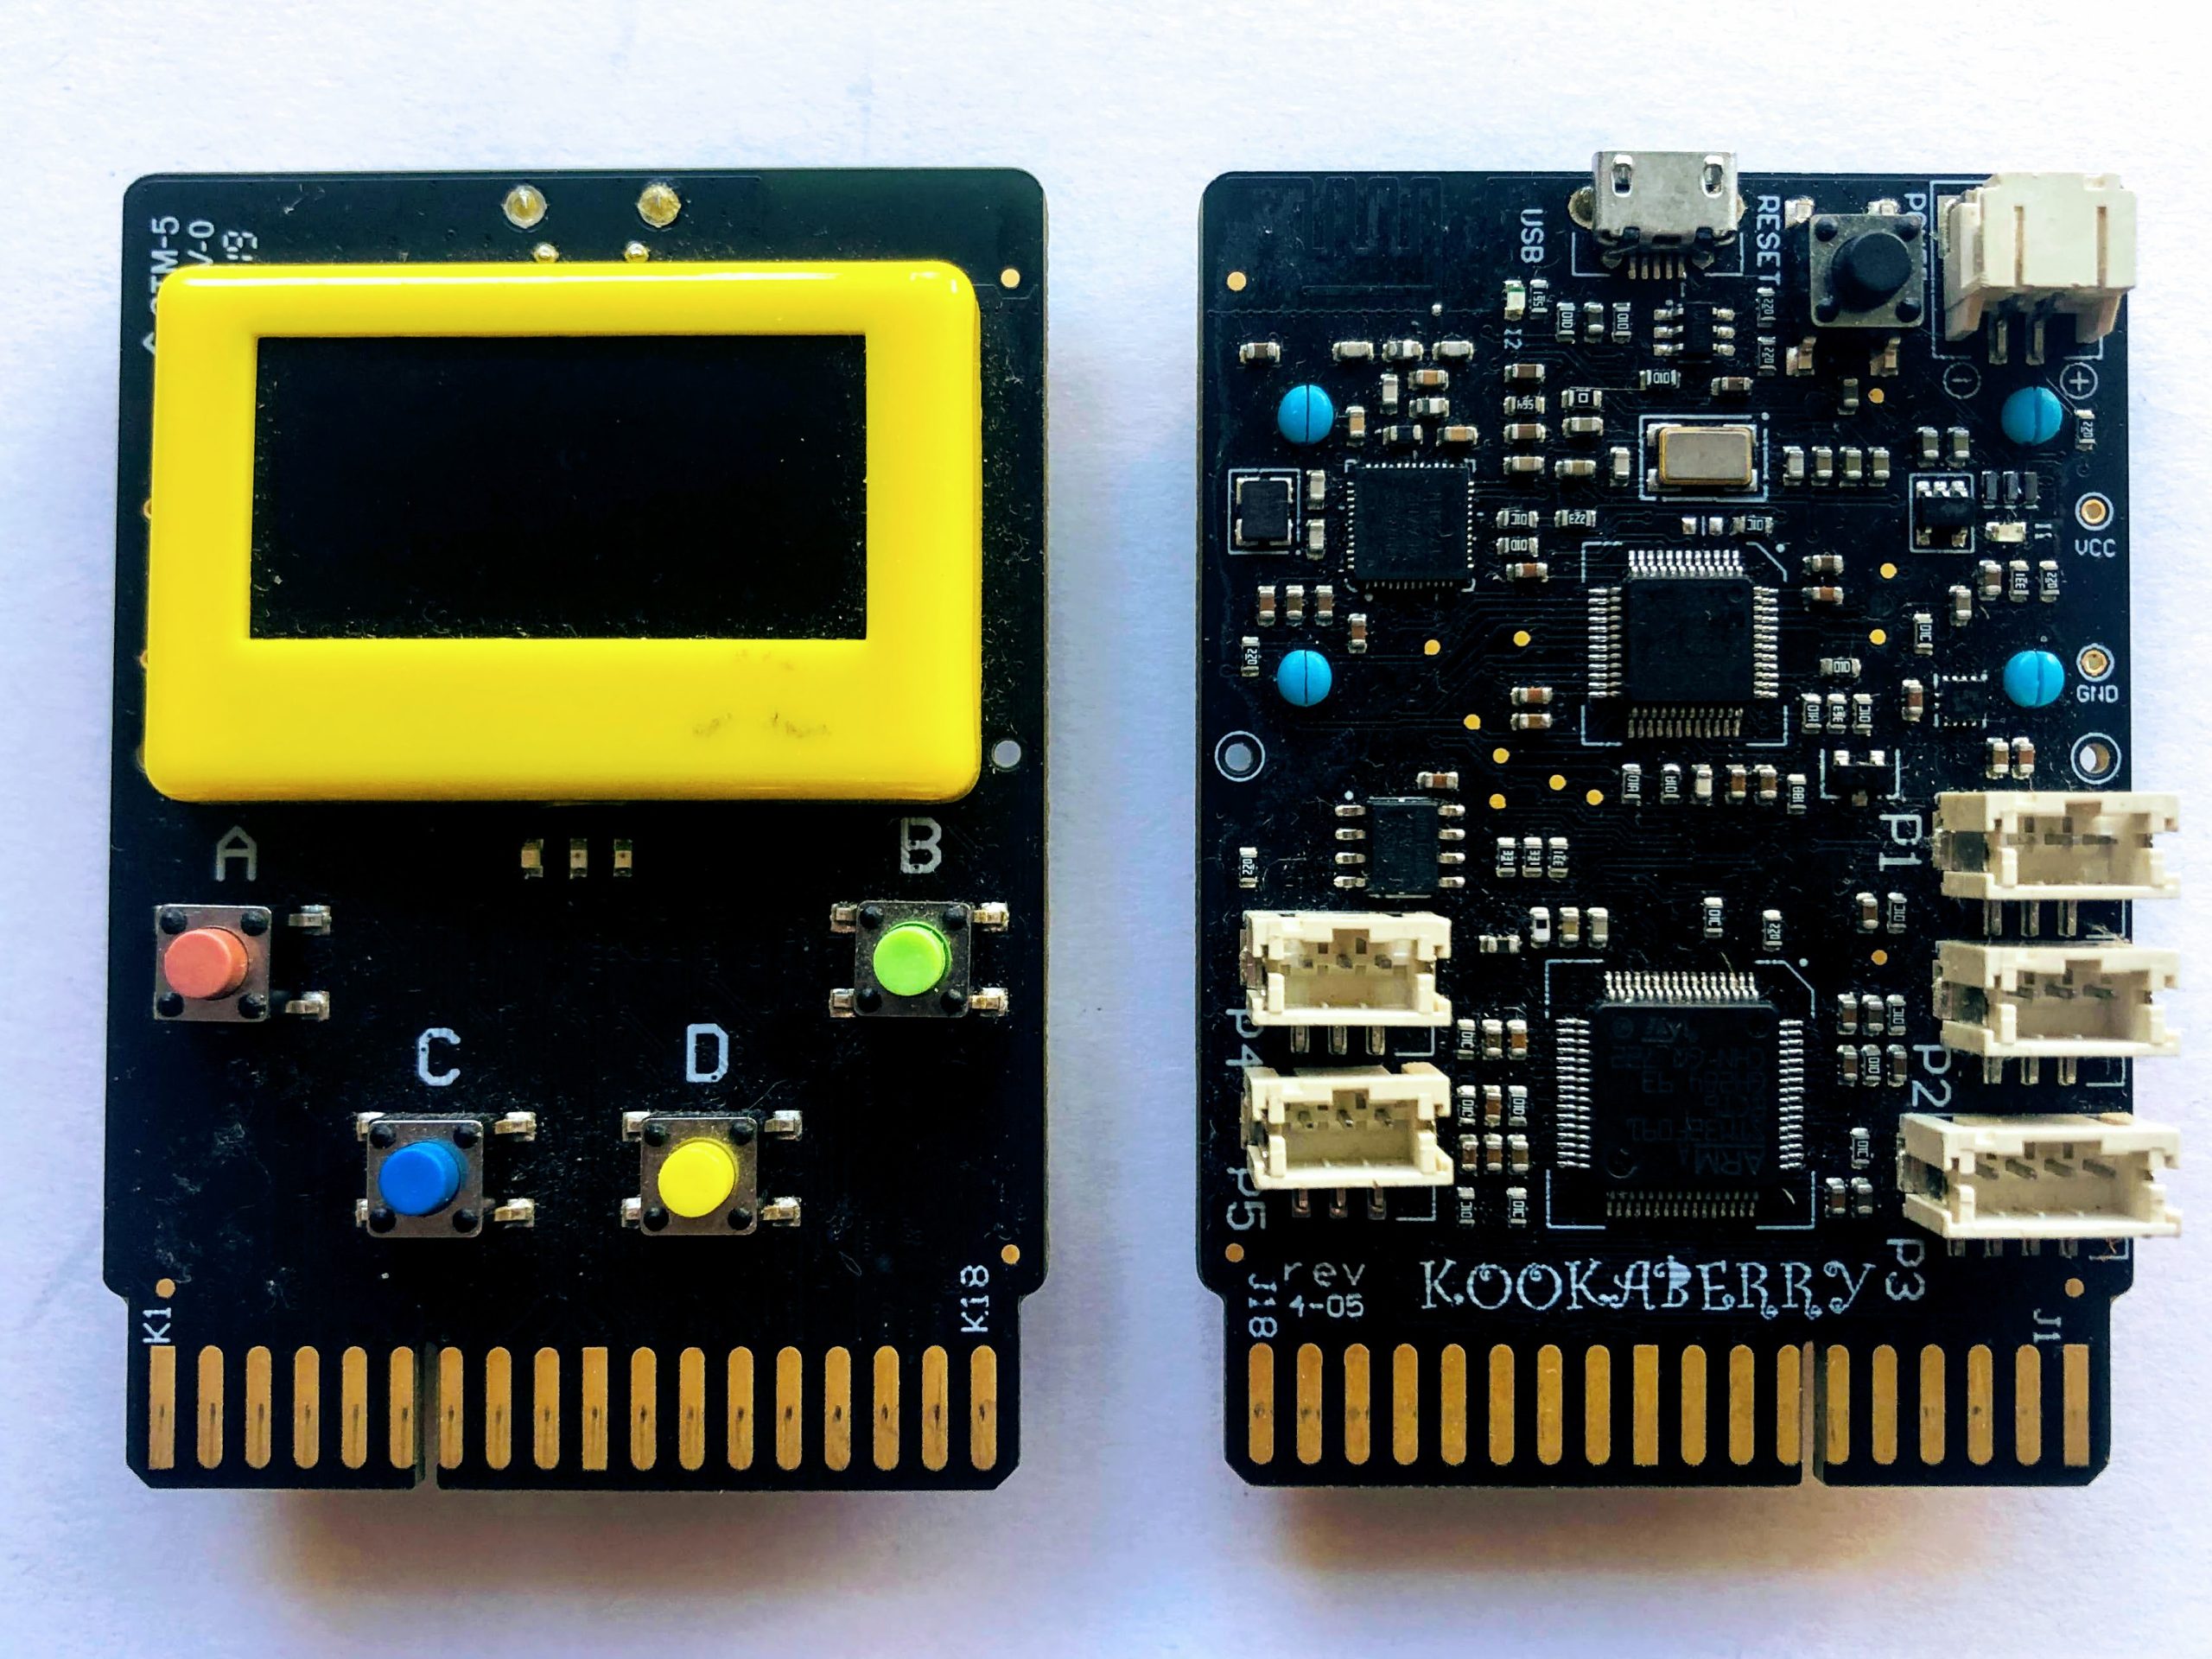
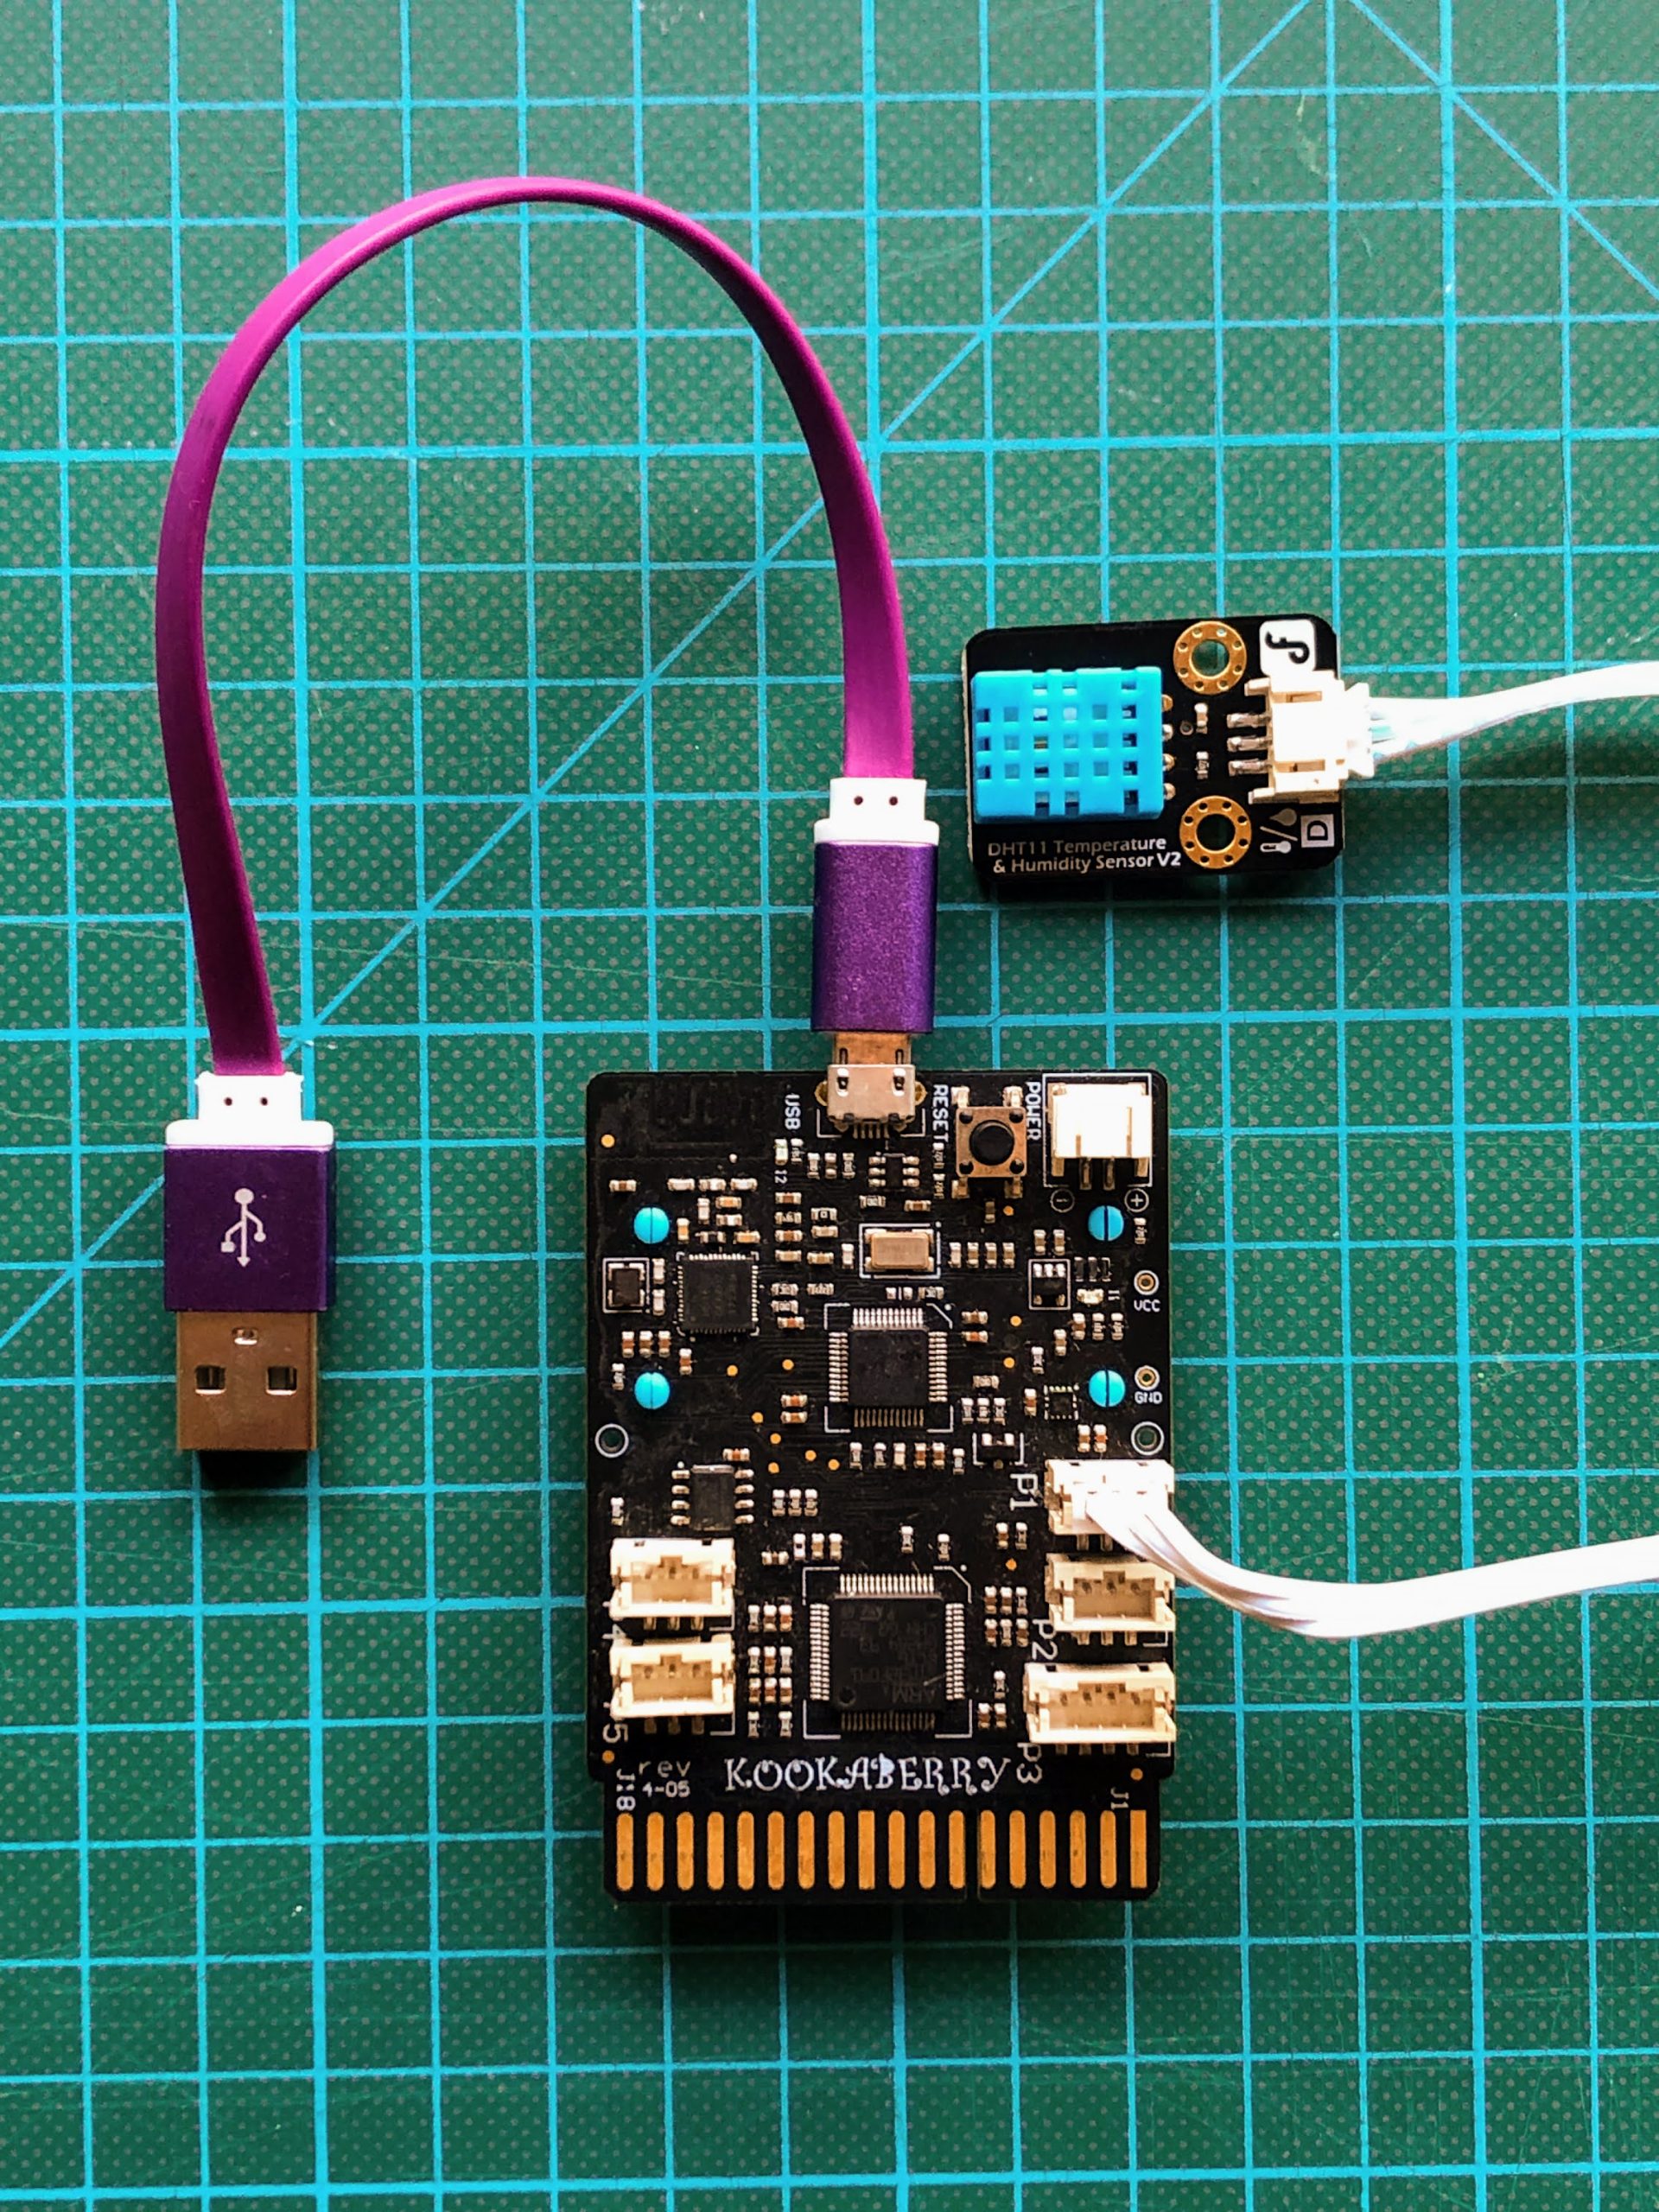
Kookaberry & USB lead

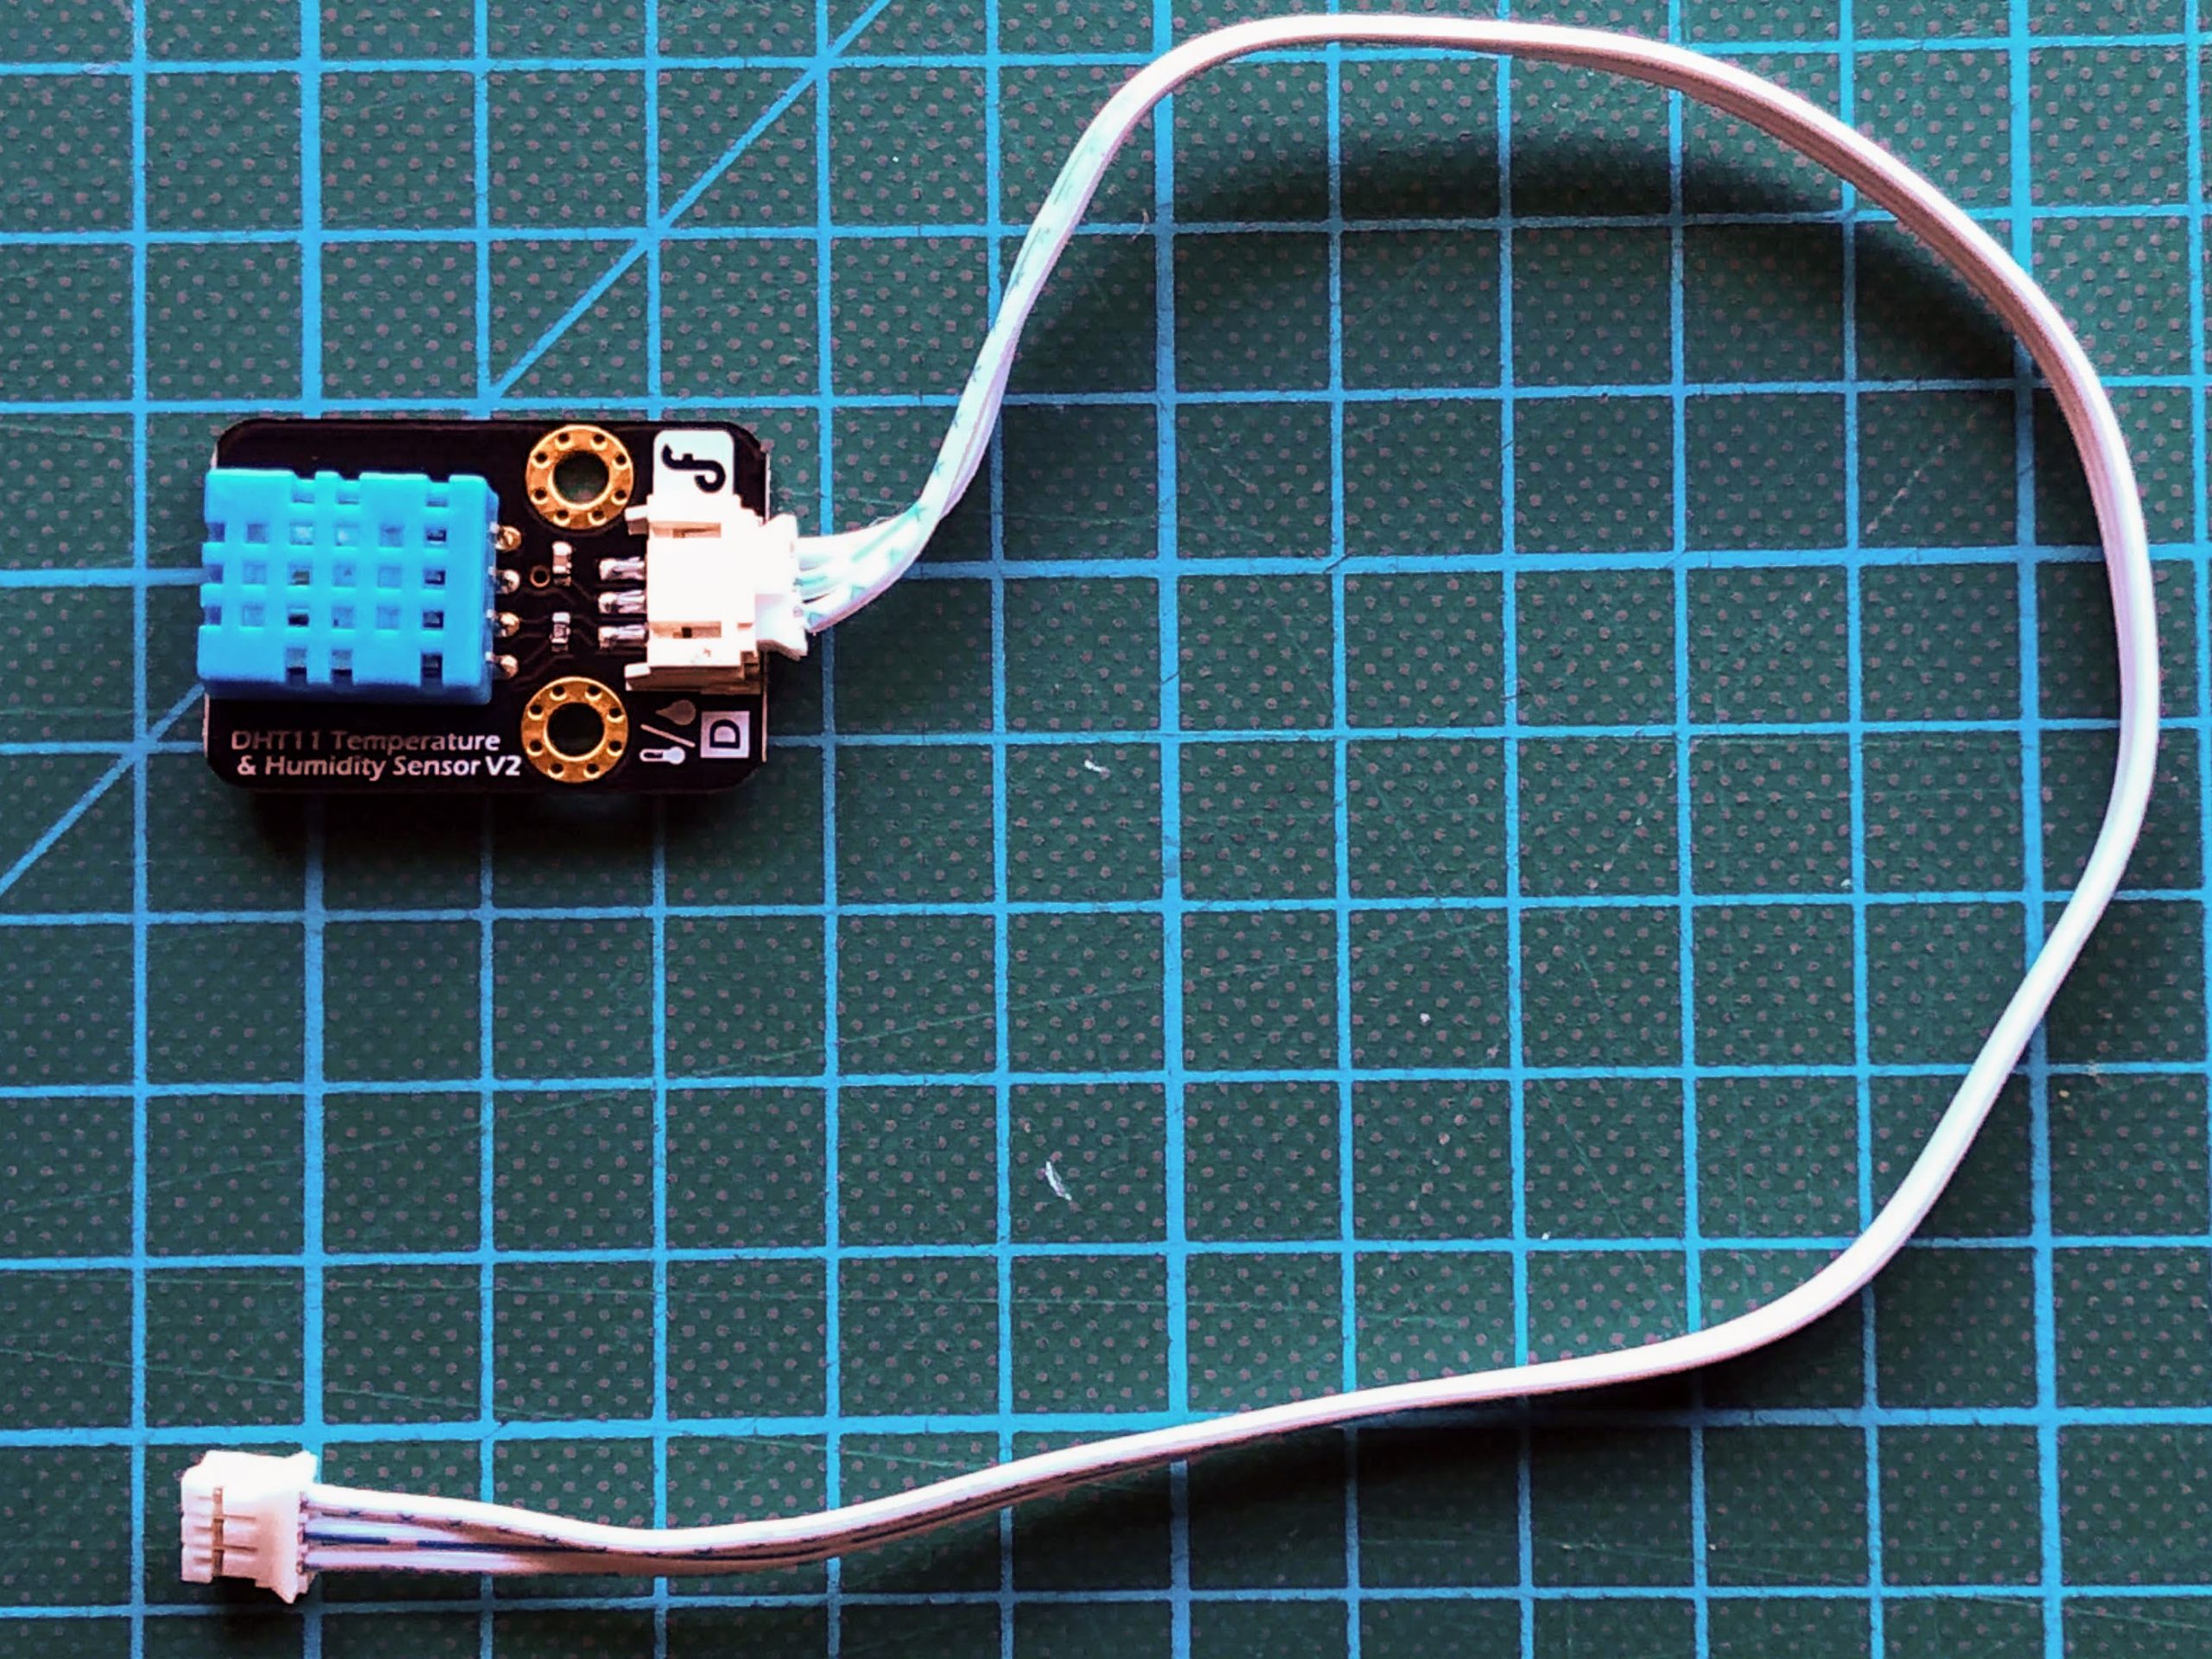
DHT11 Module plus 3pin JST peripheral lead
KookaBlockly Visual Editor

Connecting up
Connect the Kookaberry to your PC or Mac, and plug the DHT11 peripheral into socket P1 on your Kookaberry
DHT11 Programme (Continuous)
The DHT11 module measures two variables – RH and temperature – and transmits their values as digital signals to a connected computer (in this case the Kookaberry). The chip in the module samples the RH and T values at high speed, but a pause between reading their values at the Kookaberry interface is necessary to avoid errors occurring when measured on a continuous basis.
Setting the RH and T Variables
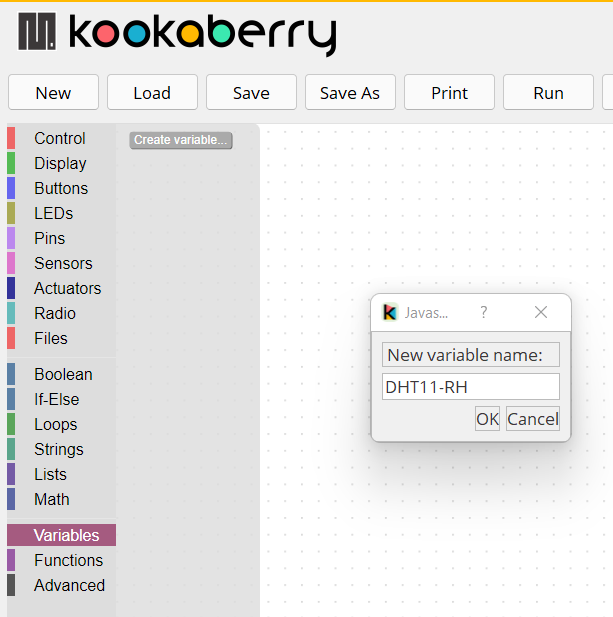
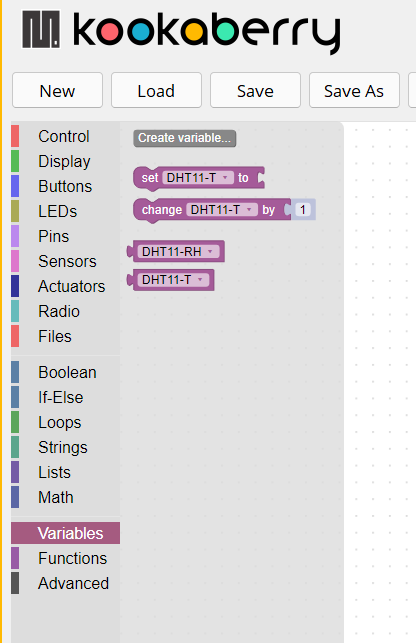
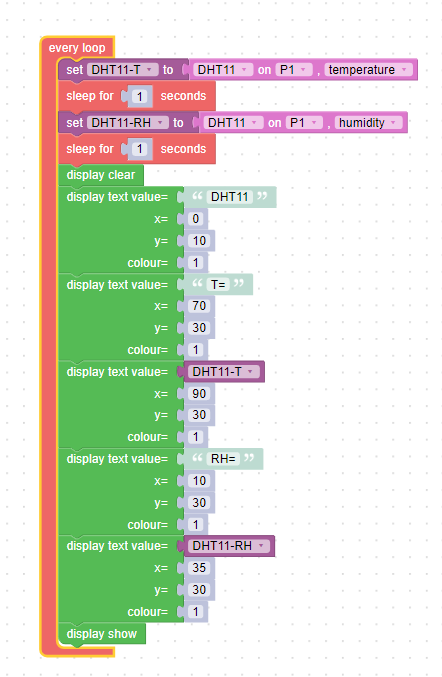
Open KookaBlockly; open the Variables menu; and click on the Create variable grey box. A prompt box will appear on the canvas inviting you to name the variable. Type in DHT11-RH and click OK. The blocks for the RH variable will appear in the Variables menu. Repeat for the Temp variable. The variable (if more than one) can be selected from the dropdown menu within the set and change blocks
Set up Control Loop for Measurement
Open the Control menu and drag the “every loop” onto the canvas. Now bring the DHT11-T variable into the loop and attach the DHT11 sensor block to it as shown Note that the selected pin is “P1” and the variable is “temperature”. Now drag the “sleep for “0.5”secs” block underneath the variable blocks and change (simply type over) the delay to 1 second. This allows for bit of time pass before the DHT11 is asked for the value of the other variable (RH in this case).
Repeat for the RH variable but change the variable name to DHT-RH and change the sensor measurement to humidity using the block’s internal dropdown menus.

Setting screen layout
Now arrange text on the screen to show the name of the programme and the individual measurements of RH and T. Remember that the screen is 128 pixels wide and 64 pixels deep and that character strings start at the specific pixel coordinates set in the display blocks.
Open the Display menu and drag the “display clear” block into the loop. This ensures that the screen is cleared ready for a new measurement at the beginning of every chip cycle. Make sure you add a complementary “show screen” block at the end of the sequence.
Now drag successive “display text value “Hello”” blocks into the loop as shown. The first, second, and fourth blocks simply start printing the required text (just type over “Hello”) at the coordinates shown.
The third and fifth blocks display the value of the variable selected from the Variables menu.
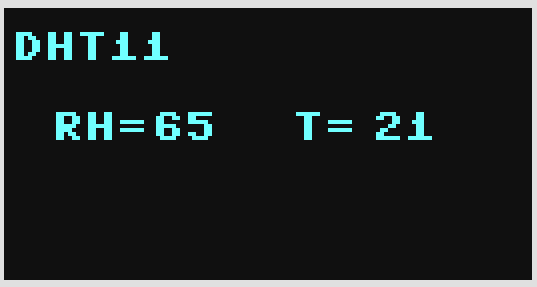
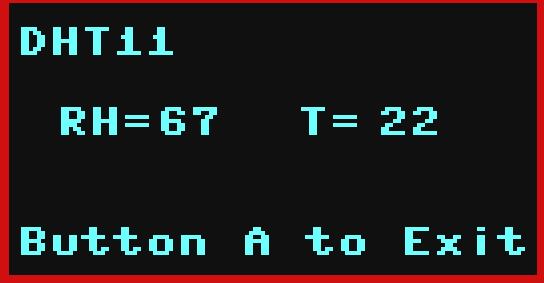
Run the programme and click on “Show display” at the top right of the KookaBlockly window. The display should be as shown below.
Save it on your Kookaberry
To save this file on your Kookaberry so that you can run it independently from your computer, you have to add
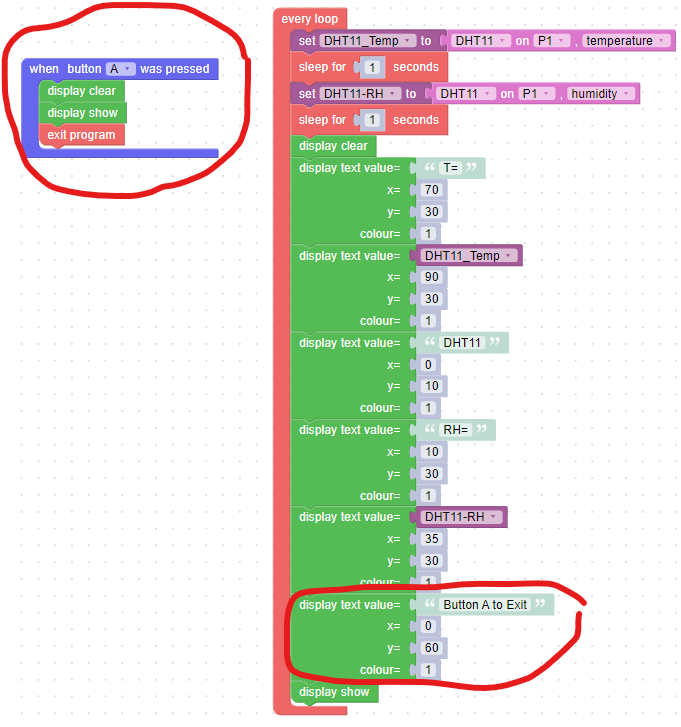
- an Exit programme instruction (press Button A to Exit)
- a command instruction (press button * to send)
- screen prompts (what button does what…)
- a suffix .kby to the file name so it can be identified as a KookaBlockly file in the Kookaberry’s menu
Additional Exit Code
DHT11 Programme (Buttons)
Measurements using the DHT11 can be also be programmed using buttons. The required measurement (RH or T) at any given moment is selected using the buttons on the Kookaberry.
Setting the RH and T Variables
Open KookaBlockly; open the Variables menu; and click on the Create variable grey box. A prompt box will appear on the canvas inviting you to name the variable. Type in DHT11-RH and click OK. The blocks for the RH variable will appear in the Variables menu. Repeat for the Temp variable. The variable (if more than one) can be selected from the dropdown menu within the set and change blocks
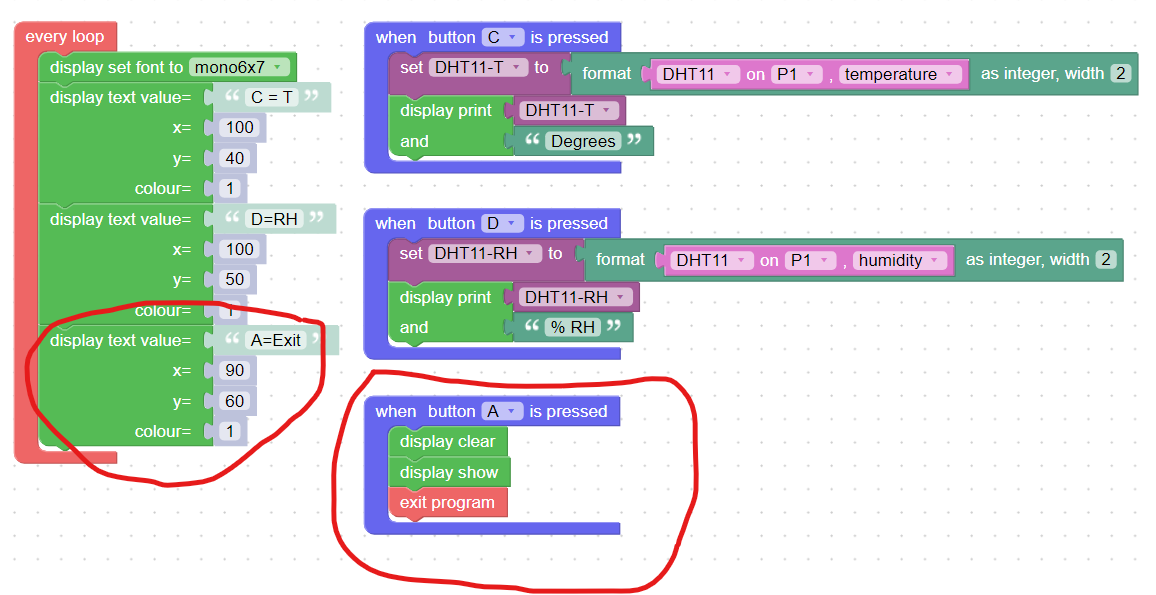
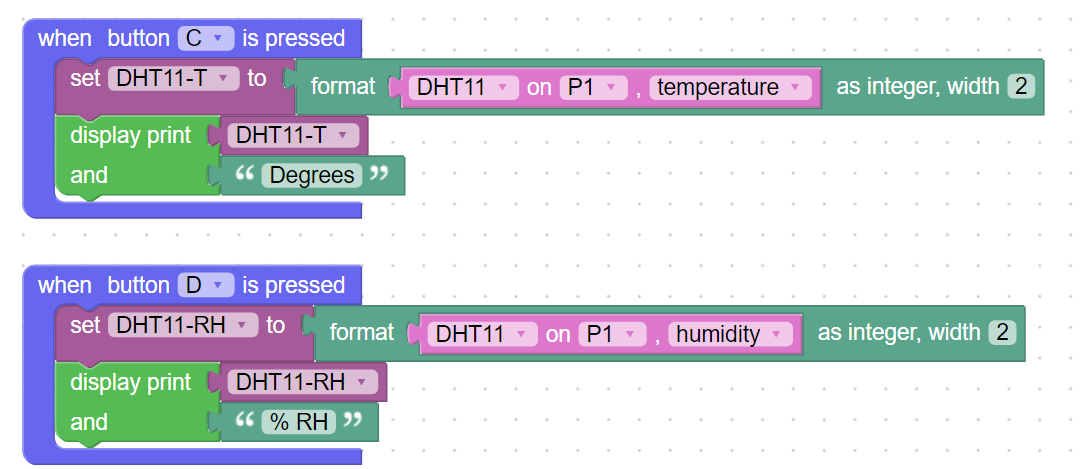
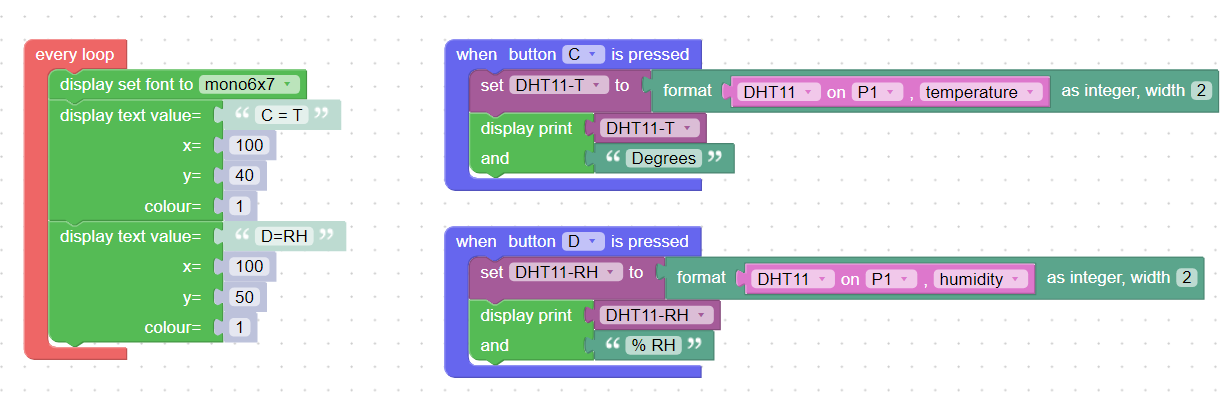
Measure temperature when Button C is pressed
Open the Buttons menu and drag the “When button “A” is pressed” block onto the canvas. Change the button to “C” using the block’s internal dropdown menu. Next
- Drag the set”….” variable into the button block and make sure the variable is set to DHT11-T
- Open the Strings menu and attach the “format as an integer” block to the variable.
- Open the Sensors menu and put the DHT11 block into the first space in the format block. Set the variable to “temperature” and the integer width to “2”. Temperature will be constrained to always be a whole number of 99 or less.
- Open the Display menu and drag the “display print/and” block into the button block. Replace the “Hello” string block with the DHT11-T variable.
- Open the String menu and replace the “123” block with the top “””” block. Type “Degrees” into this new block.
Measure temperature when Button D is pressed
Repeat the above, but with Button C measuring RH and the text to RH%
[Tip: Right click on the Button C block and select duplicate from the menu.]
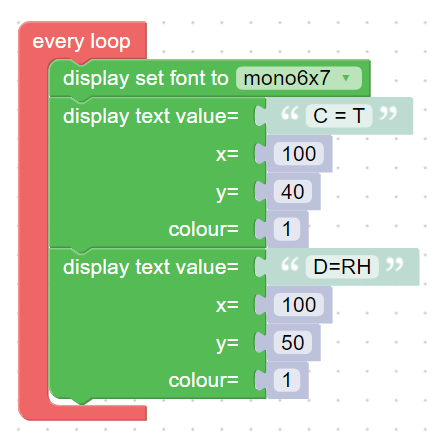
Setting screen layout
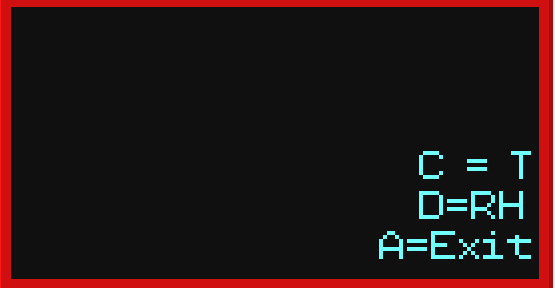
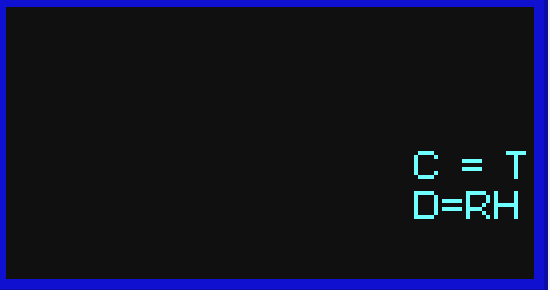
Because measurements will not appear on the screen until either Button C or D is pressed, instructions must always be present on the screen. This is achieved by a separate loop programme as shown below. Note the change of font size by dragging in the “display set font to”mono5x5″” block from the Display menu and changing it to mono6x7 using the block dropdown menu. This displays the instructions in the bottom right of the Kookaberry screen
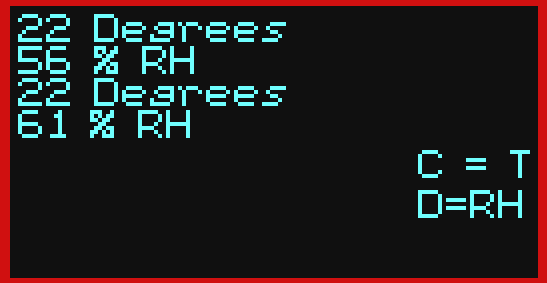
Running the programme
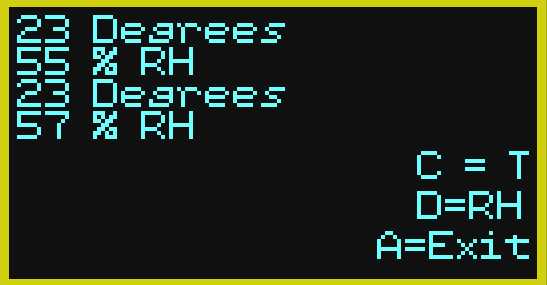
Running the complete programme and pressing Buttons C&D will display the measurements for each button press down the left-hand side of the screen (This format is created by the “display print/and” display block
Save it on your Kookaberry
To save this file on your Kookaberry so that you can run it independently from your computer, you have to add
- an Exit programme instruction (press Button A to Exit)
- include Exit button in on-screen instructions
- a command instruction (press button * to send)
- screen prompts (what button does what…)
- a suffix .kby to the file name so it can be identified as a KookaBlockly file in the Kookaberry’s menu
Additional Exit Code