Table of Contents
AustSTEM is developing a Kookaberry management tool (KookaManager) for both Windows and Mac operating systems. It is currently in its Beta stage of development.
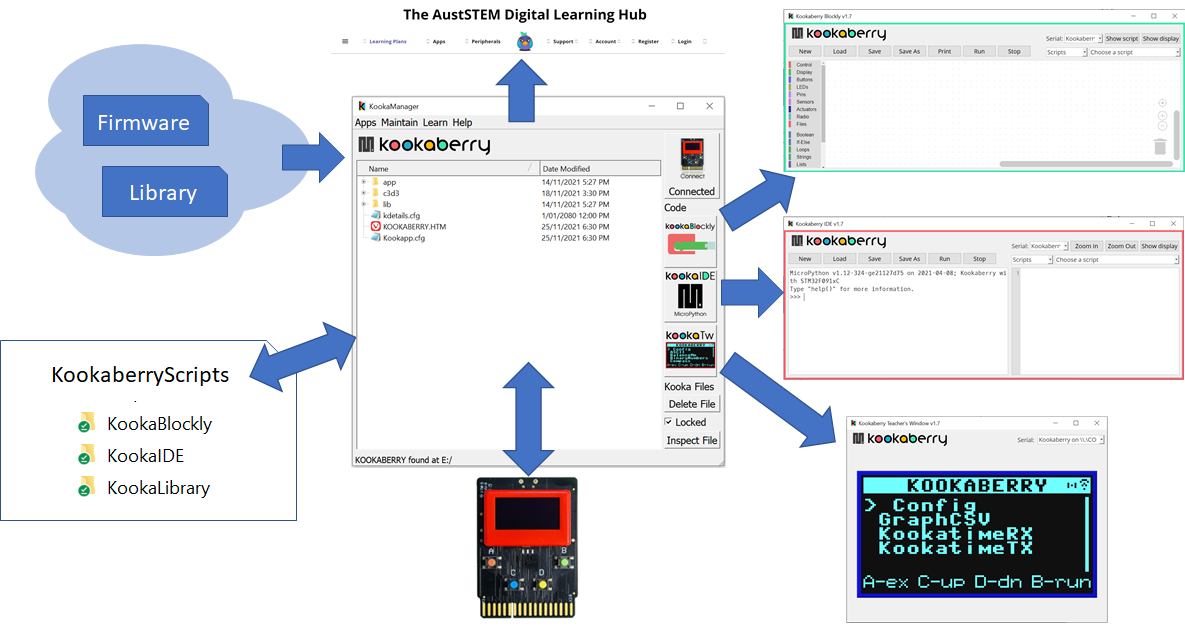
KookaManager’s purpose is to provide a dashboard for the management of the Kookaberry. Functions include:
- Launching KookaSuite apps, but only when a Kookaberry is connected
- Examining and managing the files on the Kookaberry
- Downloading the latest firmware files to the Kookaberry
- Downloading a library of pre-built Kookaberry apps and packages, any of which can then be loaded onto the Kookaberry. A tagged catalogue of apps is provided to enable relevant apps to be found.
- Transferring the users apps (Python or KookaBlockly) onto the Kookaberry for stand-alone use via the Kookaberry’s built-in menu
- Opening relevant web pages that provide instructions / information on the Kookaberry and its apps and tools.
Installing KookaManager for Windows
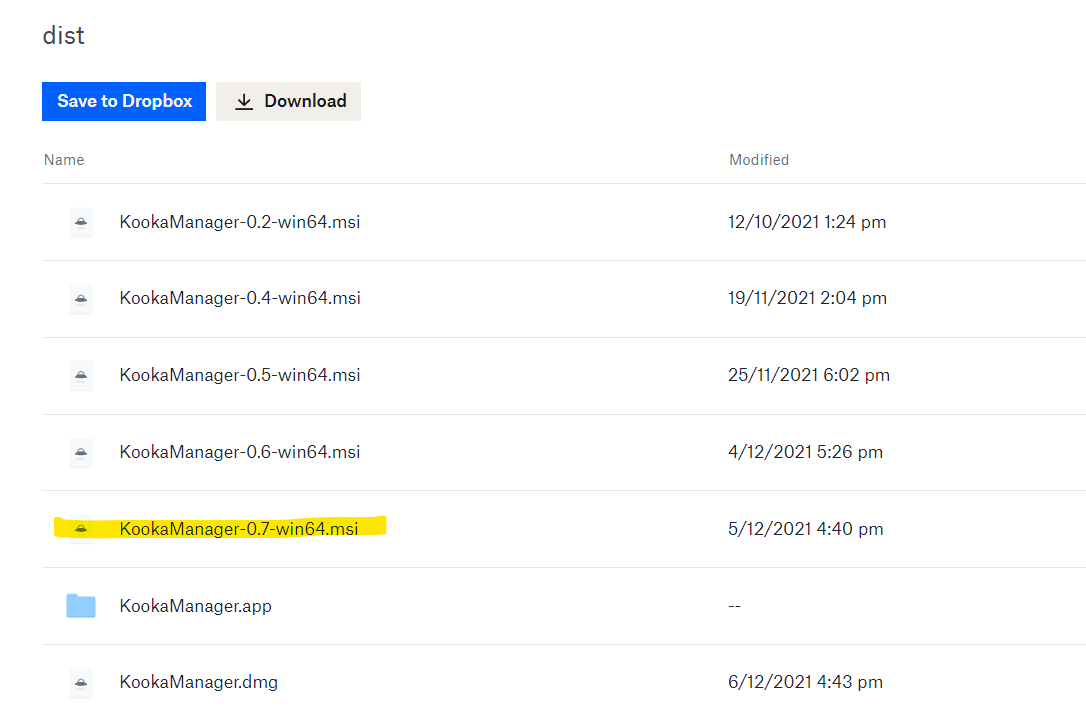
The Windows MSI installer can be found at this location: https://www.dropbox.com/sh/854n4yuesphx5ru/AAAJSs87uEJqhSvsF8u9KOgua?dl=0
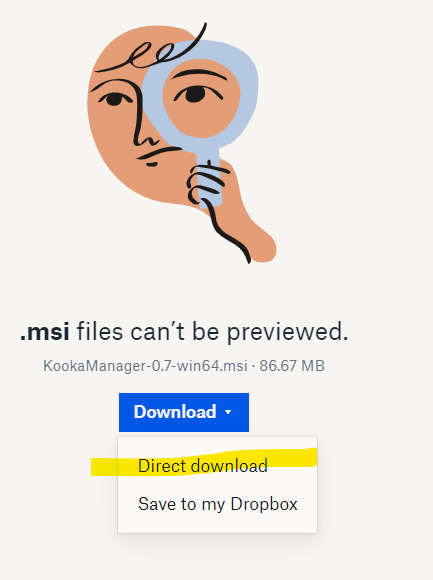
The current version is a Beta version called KookaManager-0.7-win64.msi. Click to download and then direct download again from Dropbox – don’t worry about not previewing the file. Saving to your downloads folder is fine.
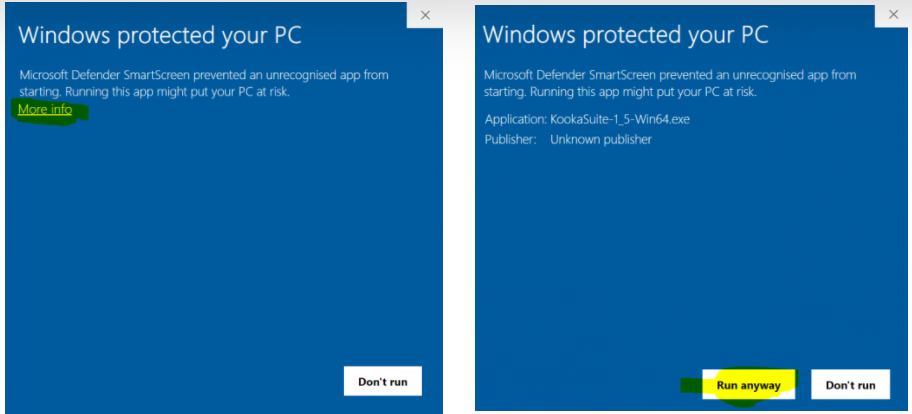
Double-click the downloaded file to run it, and navigate through the Windows security blue windows to run the file.
Opening the file will start the setup Wizard. The Wizard window will either appear as a icon in the task bar (click to open it) or directly on your screen.
Leave the Repair KookaManager button selected and click Finish. When the files have finished installing, click Finish again
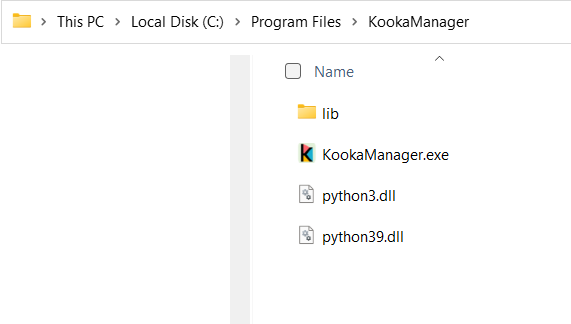
KookaManager is now saved in your system-wide Program Files folder. It can be found by navigating to the folder Local Disk(C:)>Program Files, or typing KookaManager into the search form on your taskbar. Double-click on the folder to open it, and you will see the KookaManager executable file. Right click on it to pin a short cut to Start, or to the taskbar by opening the “Show more options” menu.

Installing KookaSuite
When you first run KookaManager, you will see a prompt screen stating that KookaSuite was not found on your PC.
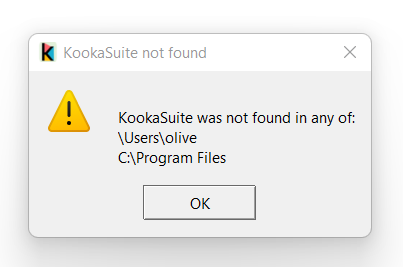
Click OK to open the KookaManager window to access the “Maintain” menu for downloading KookaSuite
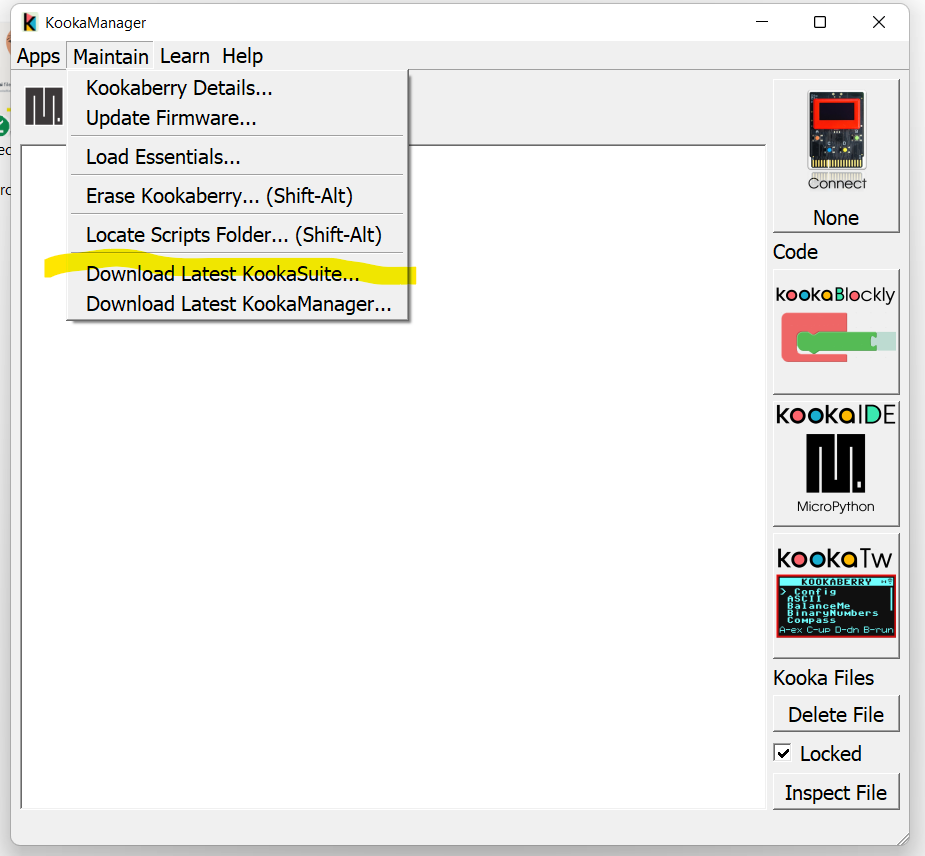
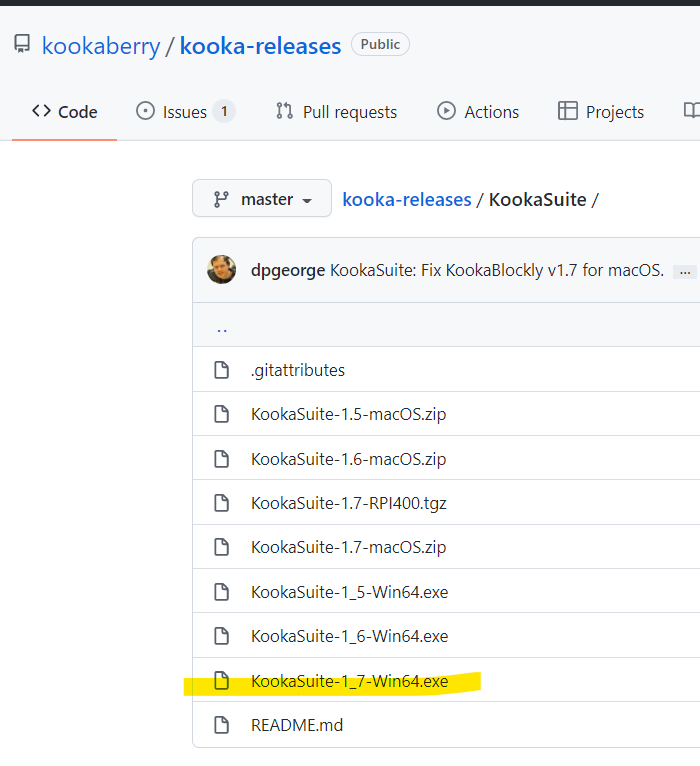
Click on “Download Latest KookaSuite” and you will be taken to the GitHub website where you select and click on the KookaSuite-1_7-Win64.exe file to bring up the Download window.
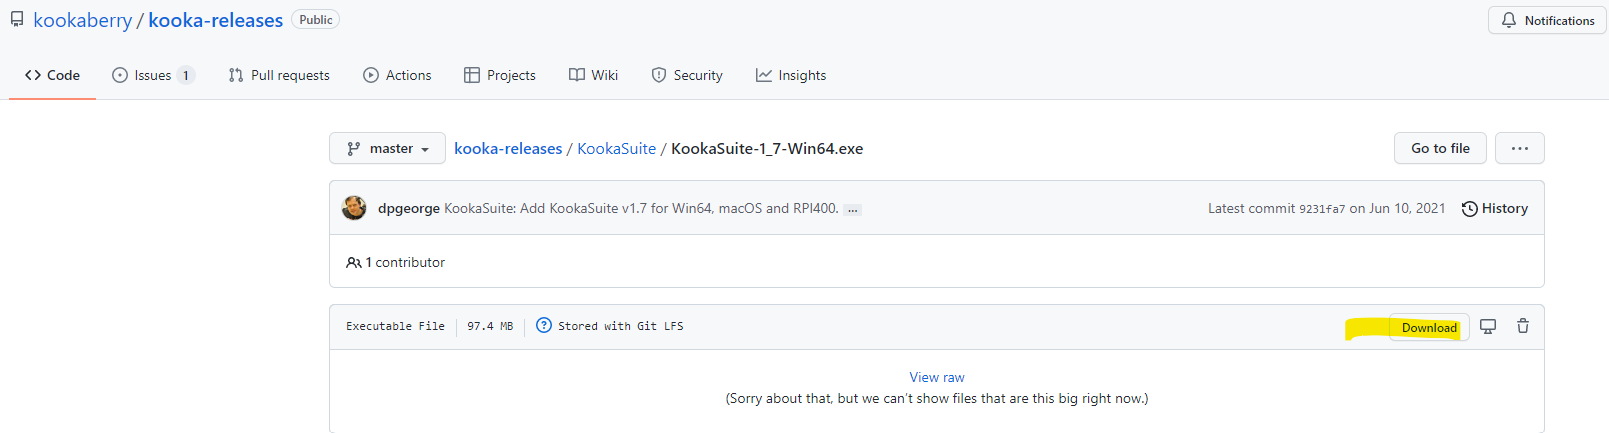
Save to your Downloads folder and double click to start installation. You will need to navigate the blue Windows PC Protection screens again… The Setup-Kookaberry wizard will then start. Follow the prompts to complete the installation and click Finish.
IMPORTANT: As this is a Beta Version, an additional operation on the Kookaberry folder that has just been downloaded will be necessary. This will be corrected in the final version
Restructure of Kookaberry Folder
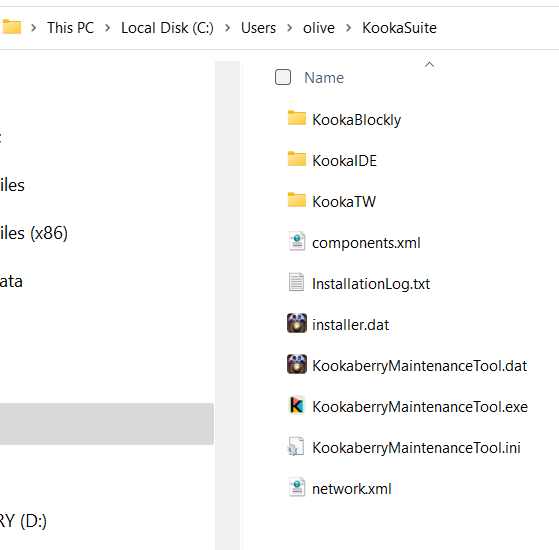
The folder downloaded from GitHub is called Kookaberry and is saved in the users>[your name] folder on your PC,
However, it contains a sub-folder 1.7 which has to be discarded before KookaManager can access the software editor files.
The name of the folder also has to be changed from Kookaberry to KookaSuite. The correct structure is shown in the screenshot below.
KookaberryScripts
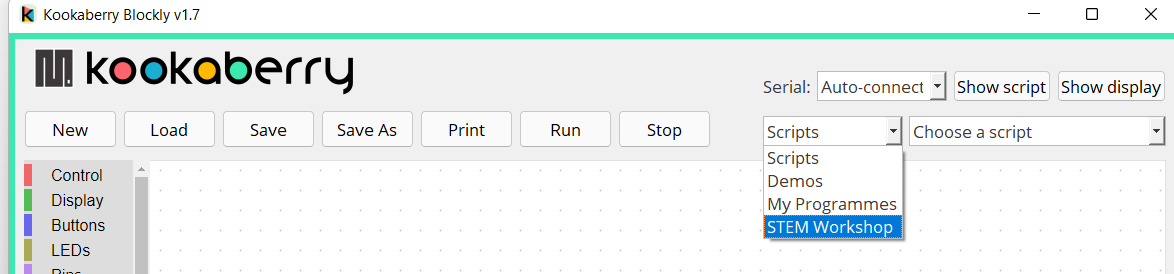
The software editors (KookaBlockly and KookaIDE) both have script (MicroPython files/programmes) drop-down menus where demo programmes and programmes by yourself can be selected and brought into the editor’s canvas.
Accessing saved scripts requires the downloading of this zipped KookaberryScripts folder. It contains sample and demo programmes.
Unzip and move the folder to the same PC disk location as the KookaSuite folder. [NOTE: A KookaLibrary folder is added to the KookaScripts folder when any one of the KookaSuite files are executed for the first time. When the Get More Apps function is selected from the Apps menu in KookaManager for the first time a prompt will ask you to update the Library and catalogue contents.]
KookaManager Functions
Overview
Once you have downloaded KookaSuite and KookaberryScripts, the KookaManager application will be fully functional
Connected Kookaberry
Connect a Kookaberry to your PC using the USB A to USB B battery lead. The contents of its USB memory will display in your windows explorer window, and also in the canvas of the KookaManager window. If, for some reason, the Kookaberry does not show up in the KM window, click on the Connect icon in the top right hand corner.
You can see all the apps preloaded into the USB memory by opening the app folder.
The MicroPython code in each app can be inspected by clicking on the Inspect File button in the bottom right hand corner.
All the files are locked by default. If you wish to delete one; select it and unlock it. Don’t forget toe lock the files again after you have finsished
Tip; It is easier to operate on the files from the Finder window……
Apps Menu
The Apps menu contains many options, but the main one is the Get More Apps menu which allows a user to investigate and download all of the AustSTEM approved applications in its library and catalogue. If the list of apps does not appear, click on Update Library. Clicking on the name of an app will show a description of the app.
If you want to download an app to your Kookaberry that is not already in its menu; select the app and click Load
Software Editors
A single click on one of the KookaBlockly or KookaIDE icons down the right hand side of the KookaManager window will launch the respective editor in a separate window.
Twin Window
A single click on the KookaTW icon will launch the Twin Window application which mirrors the Kookaberry’s screen on your PC in a separate window. If the window on your PC is is initially blank, disconnect the Kookaberry and then reconnect.
Updating Firmware
Firmware is the suite of software programmes that collaborates with all the various microcontroller chips and components on the board to enable the Kookaberry to work. There are just three files for the three microcontrollers which, once downloaded and run, are invisible to the user.
Microcontroller Chips
These are the three microcontroller integrated circuits on the Kookaberry board
- Front End Processor (FEP): The FEP is an STM32F103 ARM Cortex-M0 microcontroller with 128 Kb of flash memory and 20 Kb static ram. The FEP runs a preloaded program to interface between the USB computer interface and the other two on board microcontrollers. It also controls the download of applications into and out of the 32 Mbit serial memory.
- Main Processor (MP): The MP is an STM32F091 ARM-Cortex M0 microcontroller having 256 Kb of flash memory and 32 Kb static ram. This processor is the primary processor to run applications. It also provides general purpose inputs and outputs (GPIO) that may be used by the applications together with the interfacing to the other on-board peripherals – being the accelerometer / e- compass, BLE, 32 Mb flash ram (via an API to the FEP), and the OLED display.
- Bluetooth Low Energy (BLE): The BLE microcontroller is the Nordic nRF52822 ARM-Cortex M0 microcontroller with 256 Kb flash memory and 16 Kb static ram. It has a 2.4 GHz transceiver specifically for BLE communication.


Firmware Version
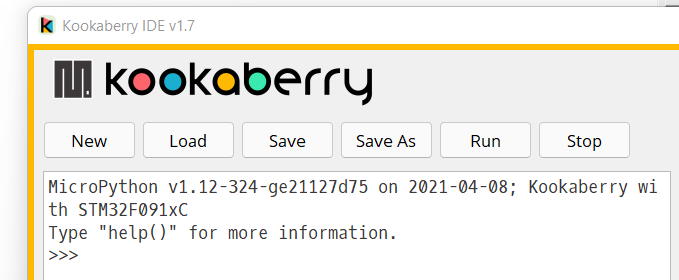
You can find out the version of firmware that your Kookaberry is using by connecting it to KookaIDE and observing the date in the connection data at the top of the left hand window. The current latest version (as at February 2022) is shown in the screen shot below. If the connection data in your Kookaberry is not the same, then you will need to download files to update the firmware.
Downloading latest version of firmware
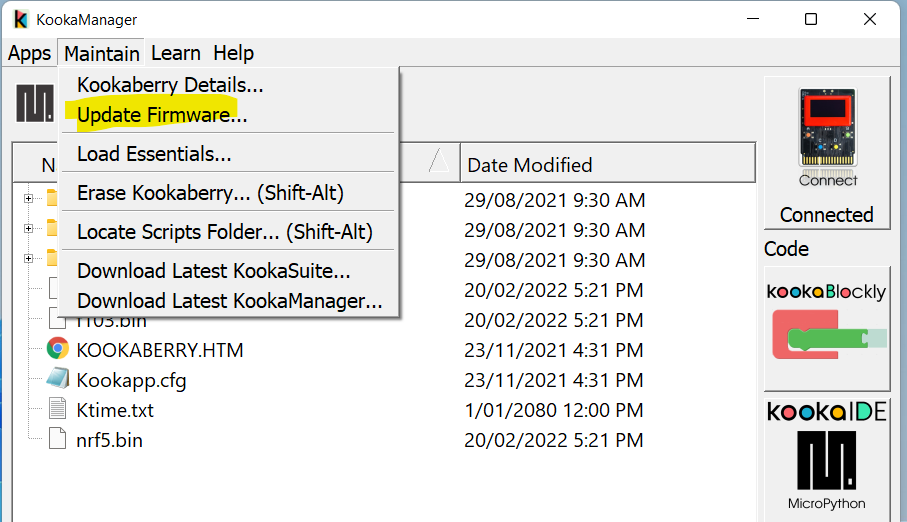
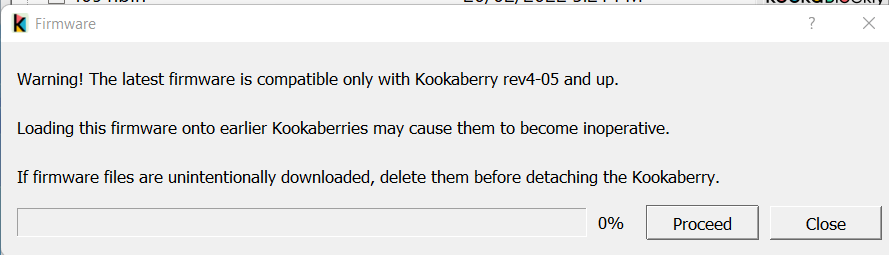
Click on the Maintain menu and click on Update Firmware… A warning will appear which relates to issues unlikely to be present on your Kookaberry. Press Proceed
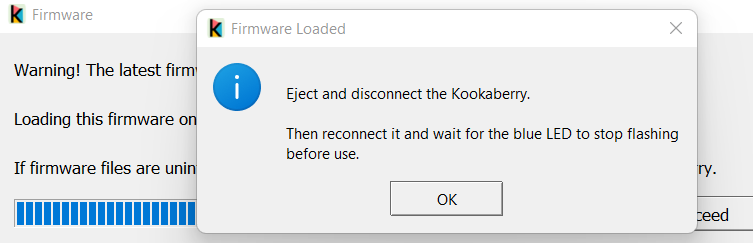
The KM will not respond for a number of seconds – be patient. The firmware will then load quickly and a prompt will appear as follows. You can leave the Kookaberry connected to the PC. No other software will be impacted. If the connect data is not showing in the KookIDE LH pane, then click Connect at the top RH corner of the KookaManager.
When download is complete, follow the instructions in the prompt